Follow the steps below to configure your organisation’s OKTA SSO account with the Glider platform.
-
Sign into Okta as an administrator
-
Go to Admin Dashboard > Application > Add Application
-
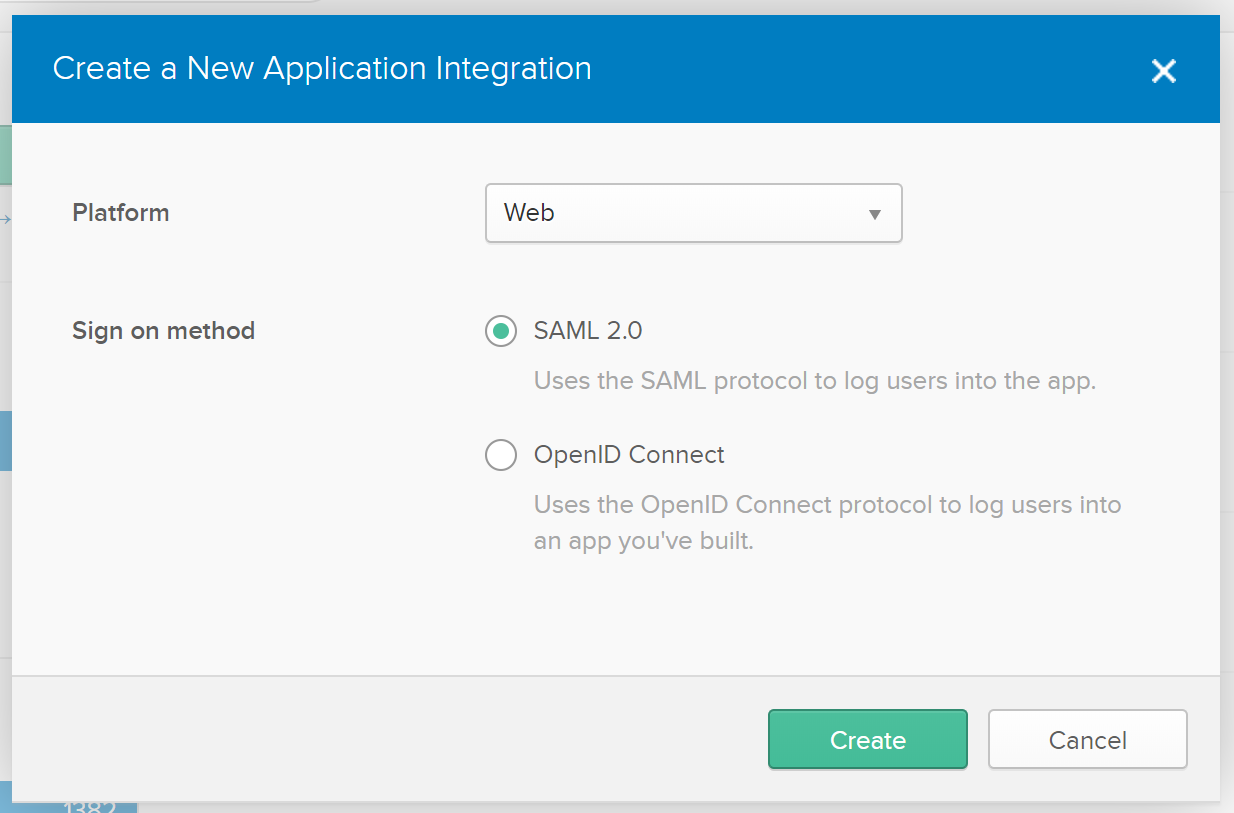
Click Create New App and choose SAML 2.0 as the Sign on method
-
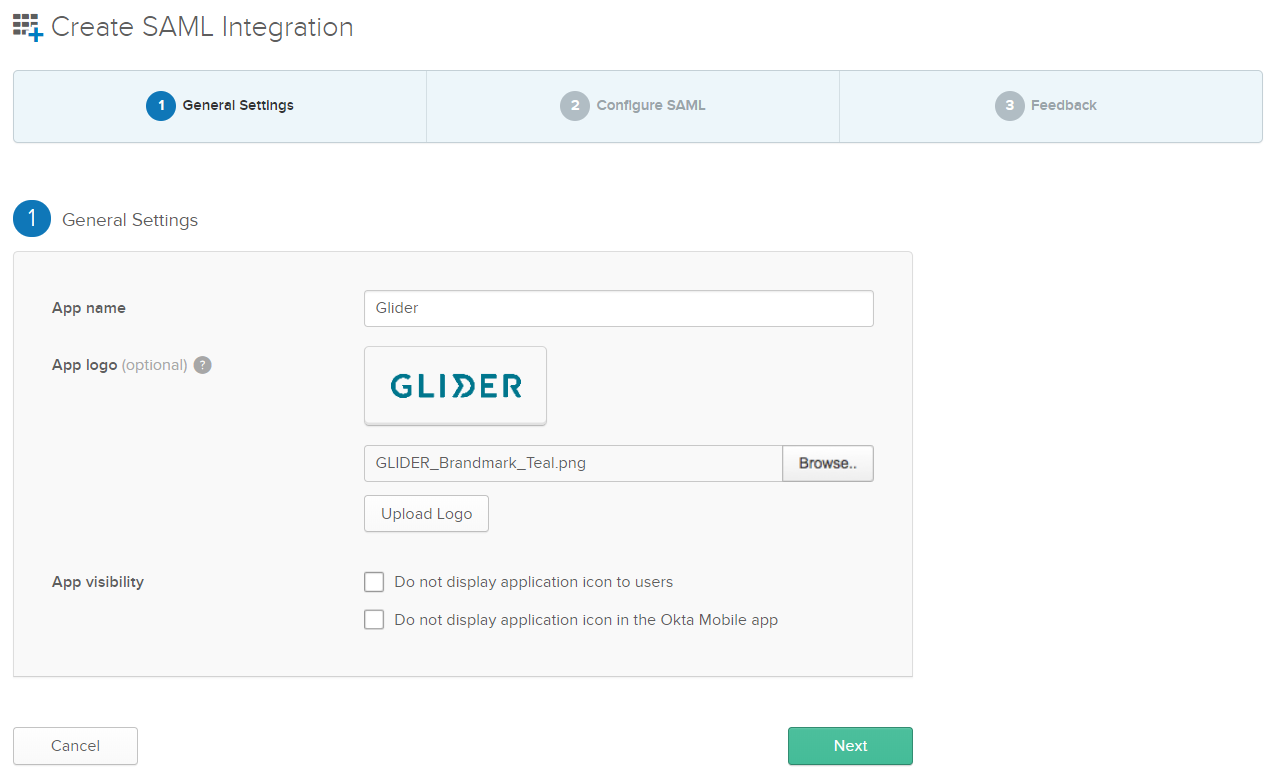
Enter General Settings for the application, including App name and App logo (optional). It is recommended to display the application icon to users, including in the Okta Mobile app.
If you’d like to use a Glider logo for the application, you can download it from: https://www.gliderpay.com/wp-content/uploads/2019/10/GLIDER_Brandmark_Teal.png
-
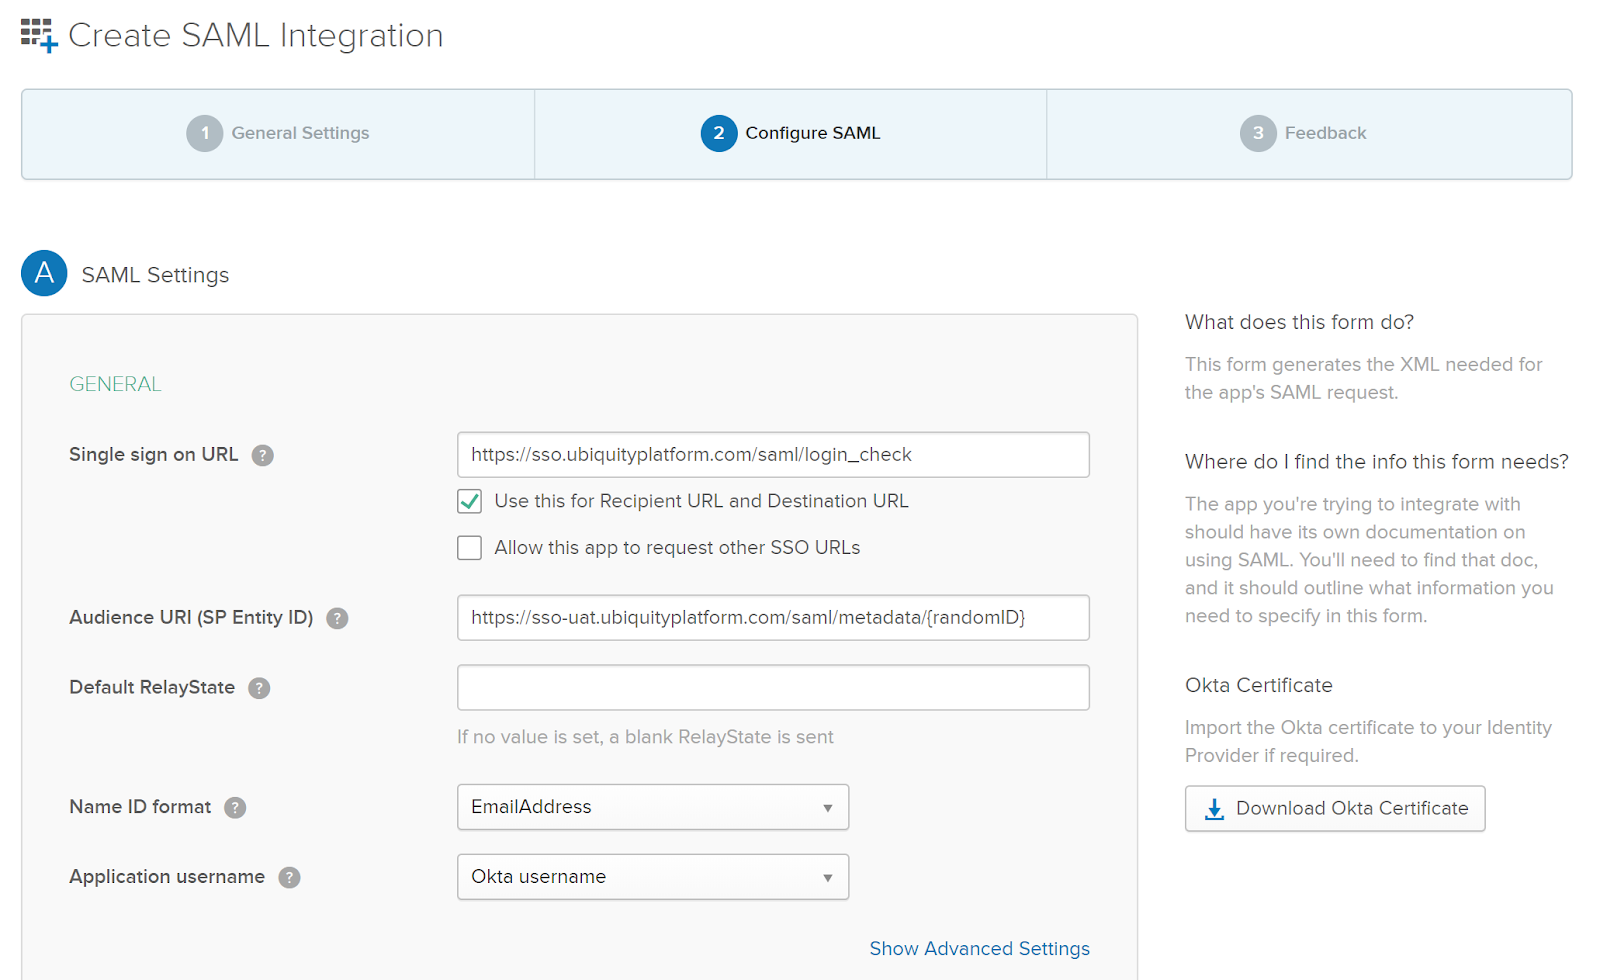
Enter SAML Settings, including:
Single sign on URL: [https://sso.ubiquityplatform.com/saml/login_check]
(or https://sso-uat.ubiquityplatform.com/saml/login_check if setting up a staging environment)
Audience URL: [https://sso.ubiquityplatform.com/saml/metadata/{randomID}]
(or https://sso-uat.ubiquityplatform.com/saml/metadata/{randomID} for staging)
The randomID value will be provided by Glider to your IT support representative.
Name ID format:EmailAddress
Application username:Okta username
-
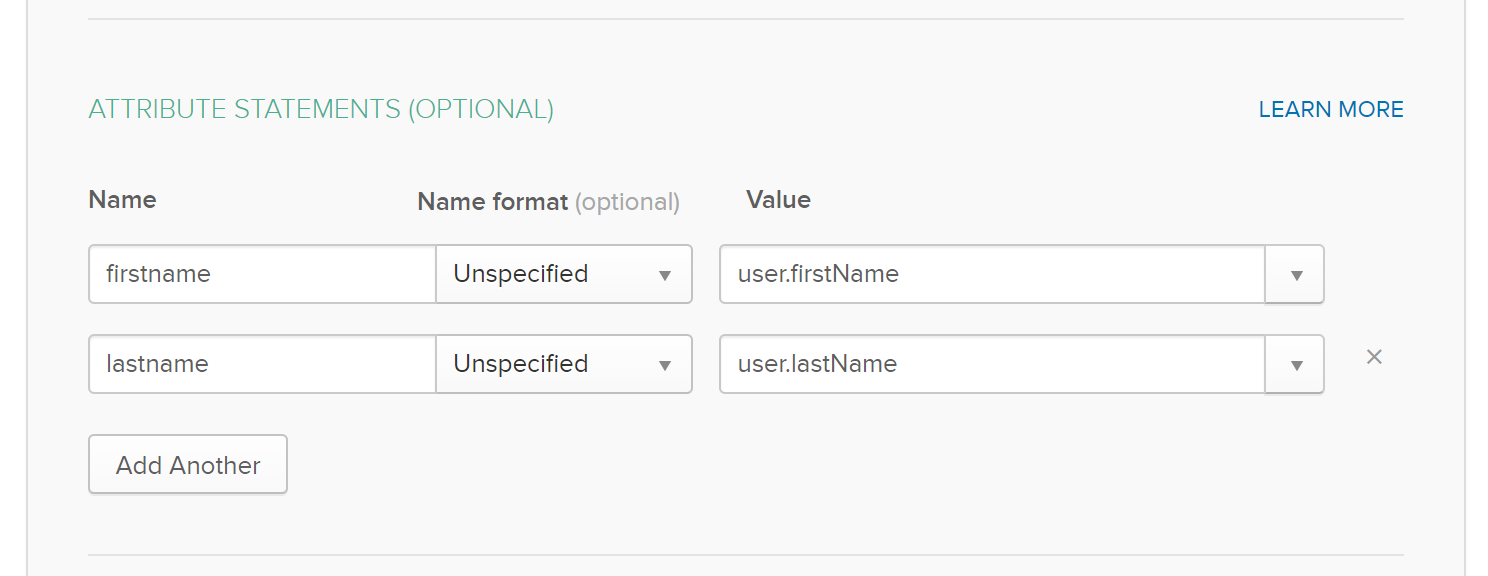
Enter attribute statements, which will be used to map attributes between Okta and Glider. First name
firstnameand last namelastnameattributes are required.
-
Click Next. Then, set Okta support parameters for the application. Recommended settings:
- I’m an Okta customer adding an internal app
- This is an internal app that we have created
-
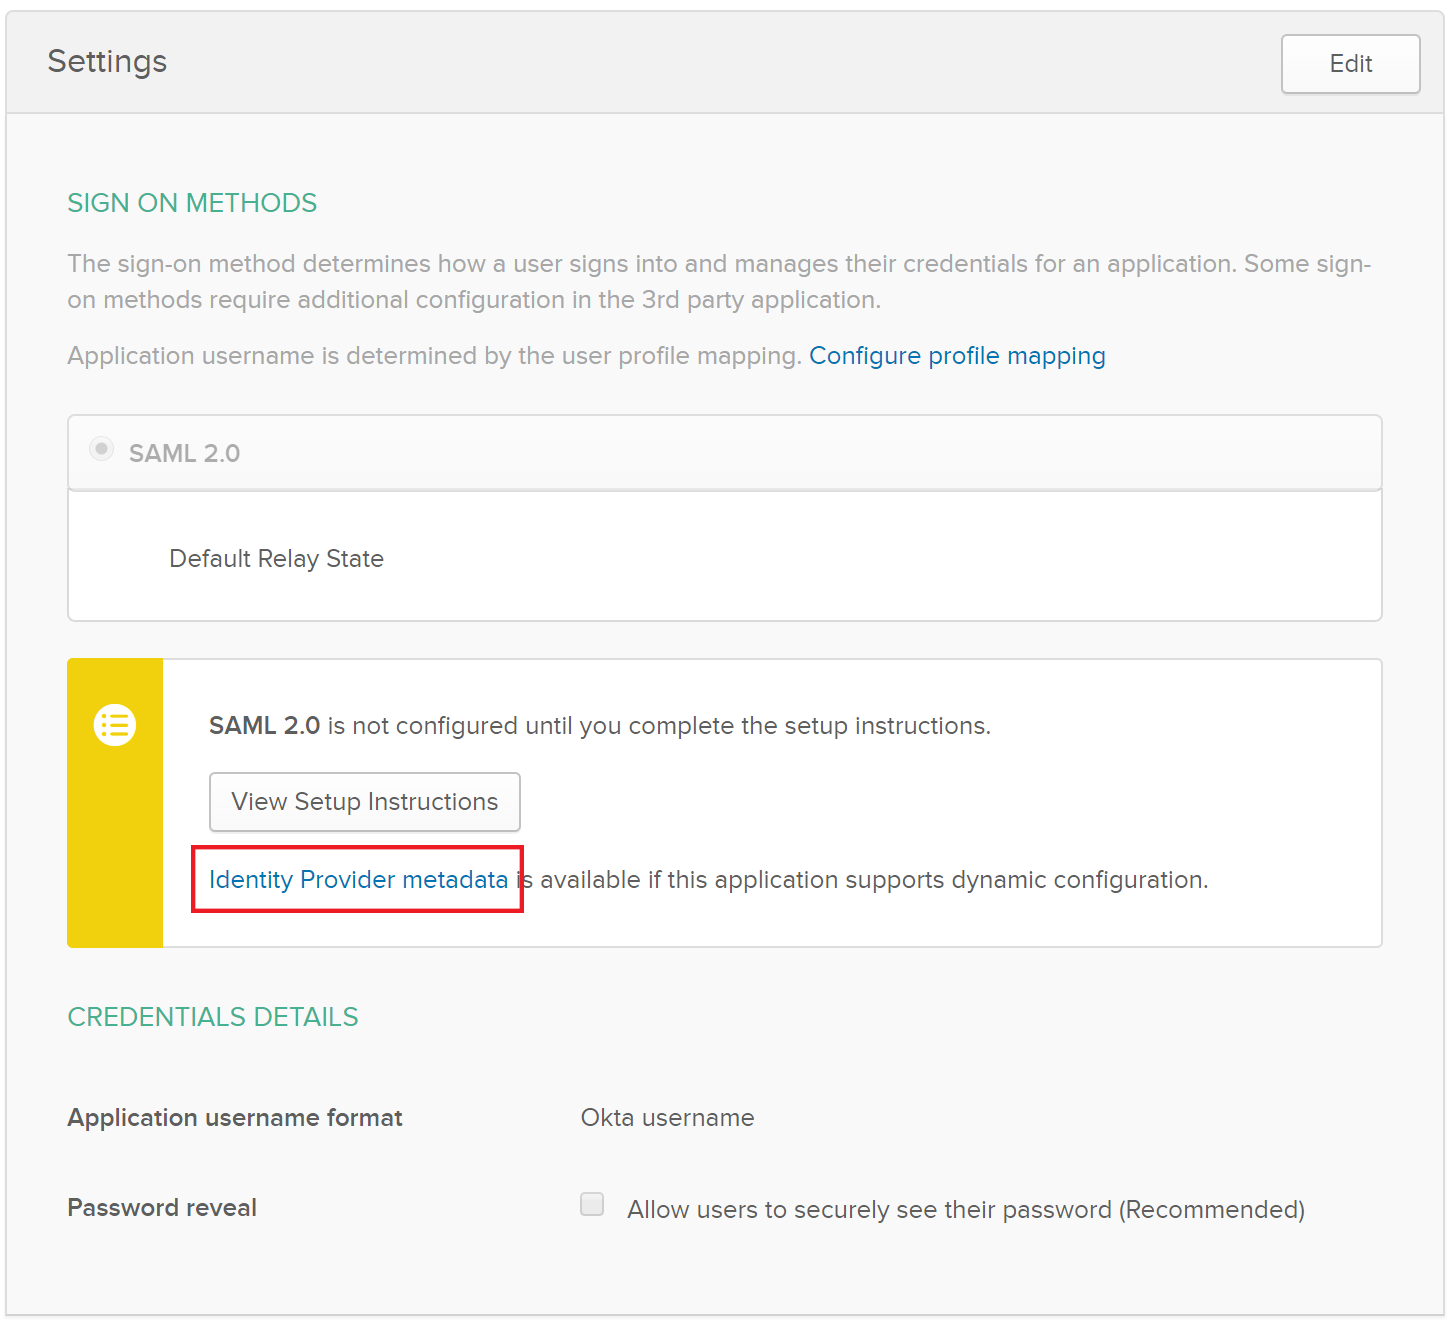
Click Finish. On the next screen, click the Sign On tab and collect the link URL Identity Provider Metadata.
Example: [https://mycompany.okta.com/app/xxxxxxxxxxxxxxxxxxxx/sso/saml/metadata]
-
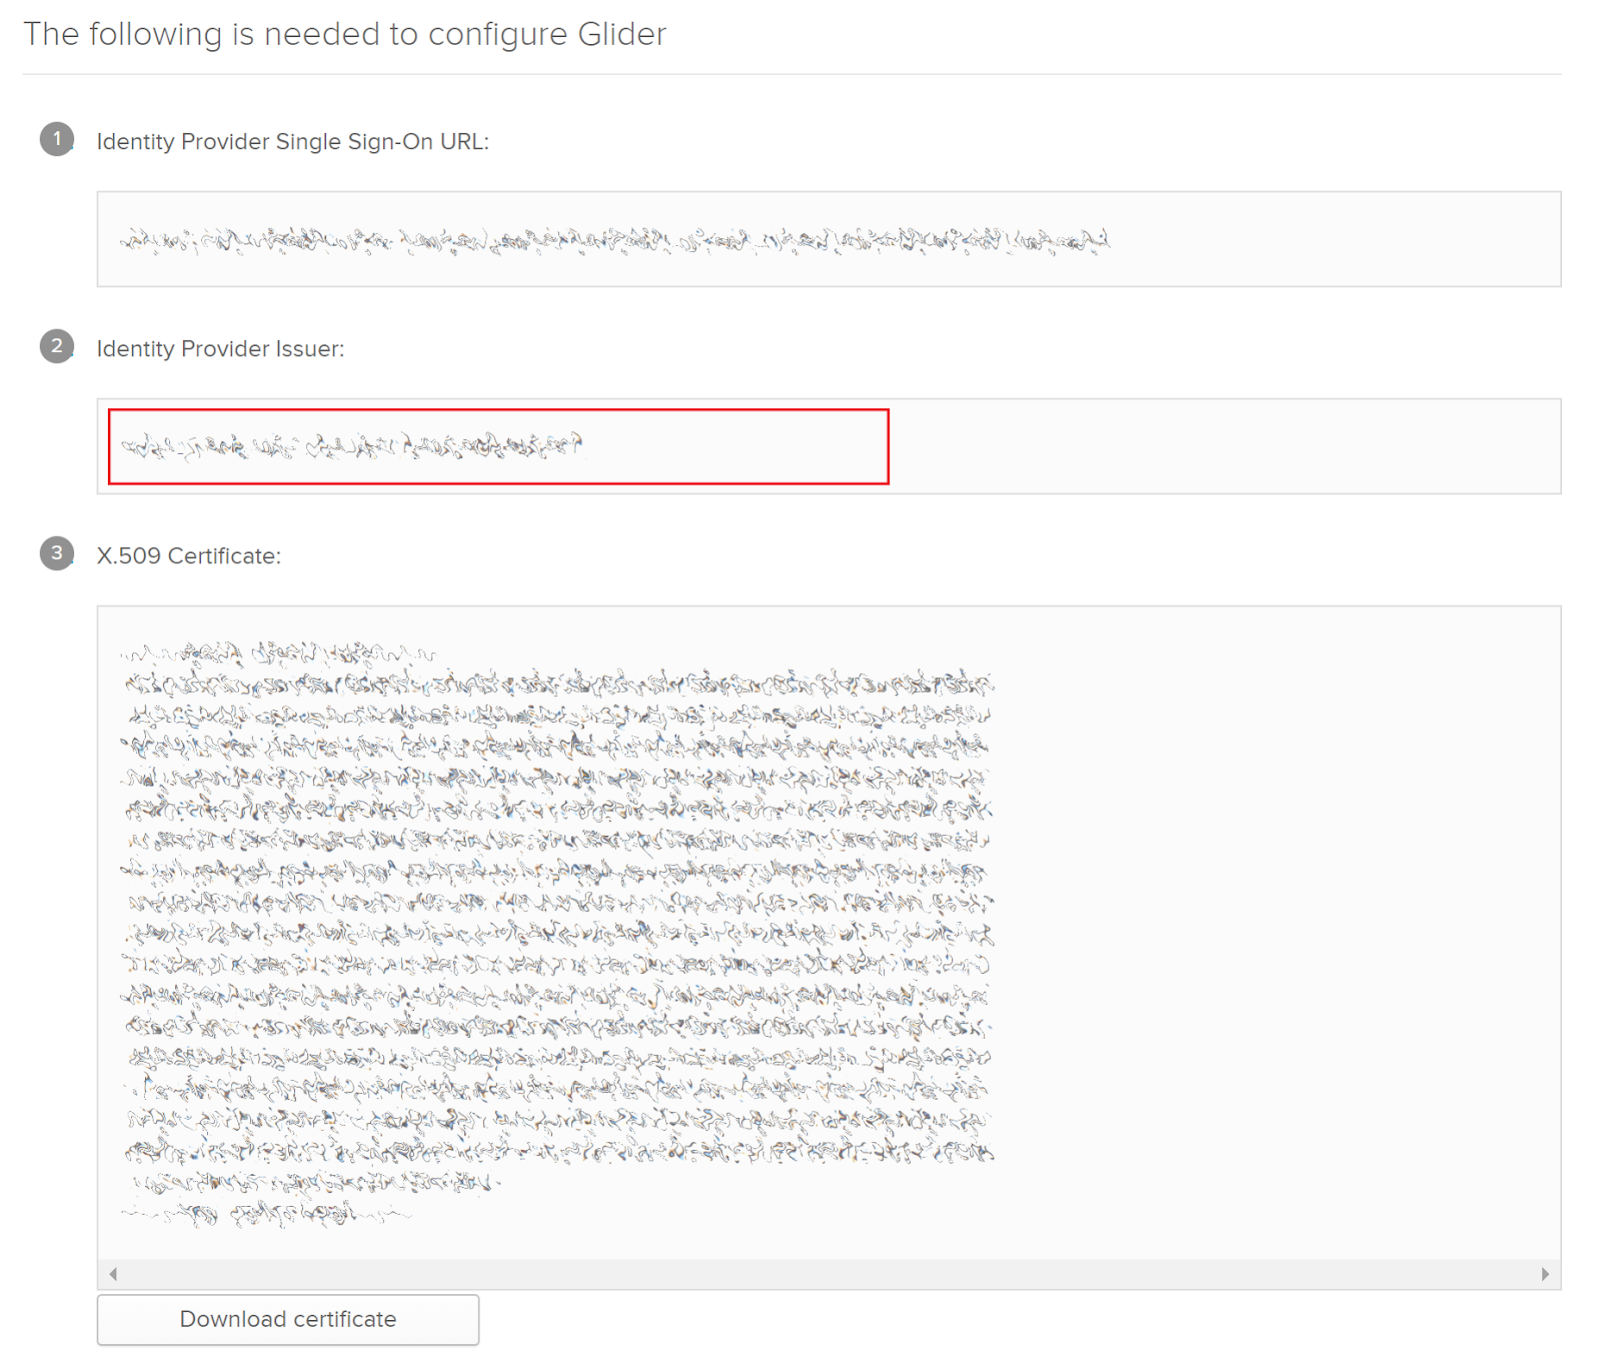
Click on View Setup instructions and take a note of the Identity Provider Issuer. The Glider team will need that to configure SAML on Glider
-
Create a new Okta user account for Glider and assign the Glider app to him.
The Glider team will use those credentials to test the correct SAML configuration, you will be able to remove them once the process is completed. -
Securely send to your Glider representative the following values collected on steps 8, 9 and 10:
- Identity Provider Metadata URL
- Identity Provider Issuer
- Glider test user credentials