
Embedded Widget Setup
The Embedded Widget integration method allows for a smooth and secure transaction process, enabling agents to send payment requests via various channels while maintaining PCI compliance and enhancing customer experience.
This guide will walk you through integrating Glider's payment widget seamlessly into your platform without any code integration.
Why embedded widget?
- Integrate Glider Widget into your platform effortlessly without any coding.
- Configurable iframe for seamless customisation.
- No login required for users.
- Pre-filled fields for smoother transaction processing.
- Ability to track your agents' Key Performance Indicators (KPIs).
Integration Steps
Step 1: Obtain API Key
If you haven't generated your API key yet, please follow the steps outlined in the documentation here: Managing API Keys.
For serving multiple customers, it's essential to generate a distinct API key for each of them.
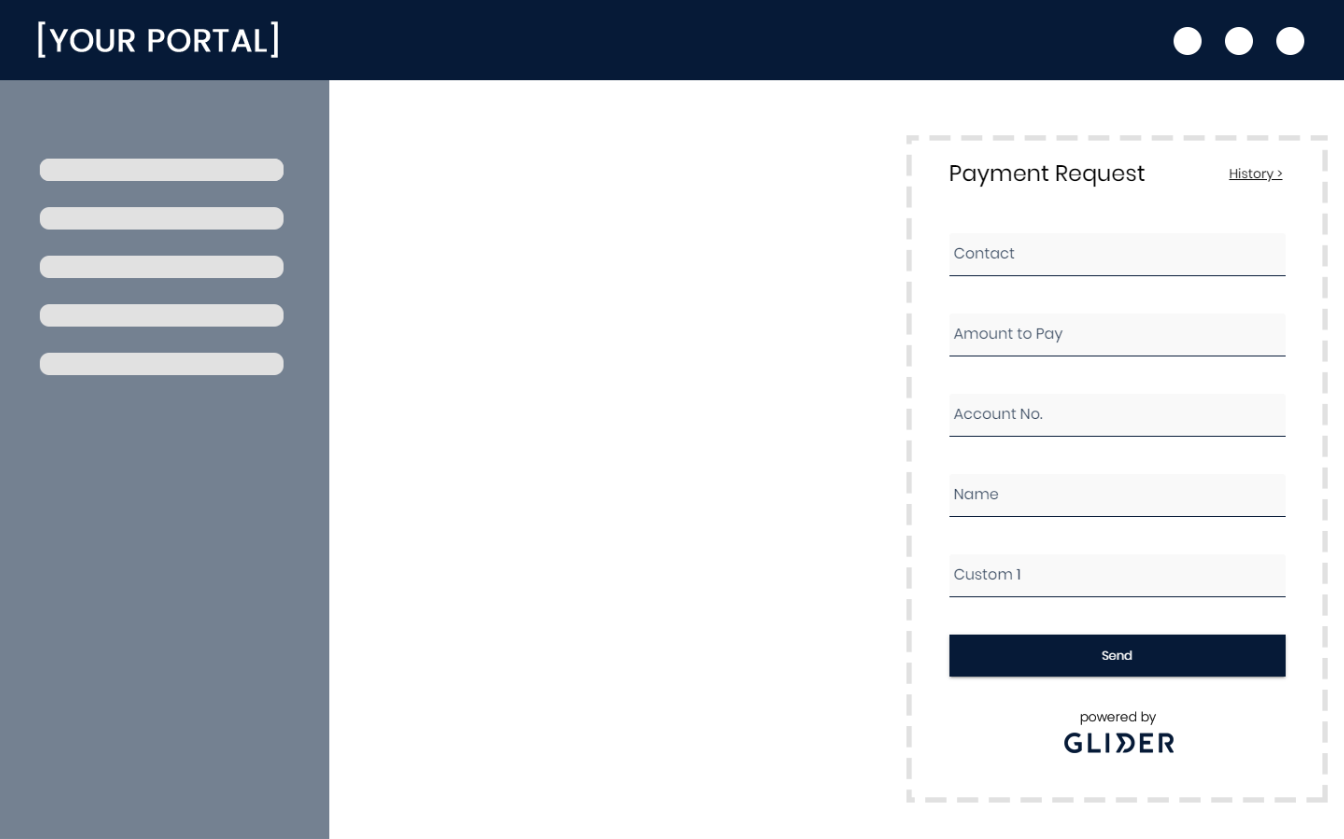
Step 2: Embed the iFrame
Simply embed the provided iFrame code into your application or platform HTML. Update the options with your API key (obtained from the previous step) and handler details.
The handler is a string used to identify the agent and can also serve as a simple tag value. For instance, it could be the username of the user's desktop.
<iframe
    src="https://embedded-widget.gliderpay.com/?apikey=<apiKey>&handler=<handler>"
    frameborder="0" width="100%" height="800" scrolling="auto"
/>
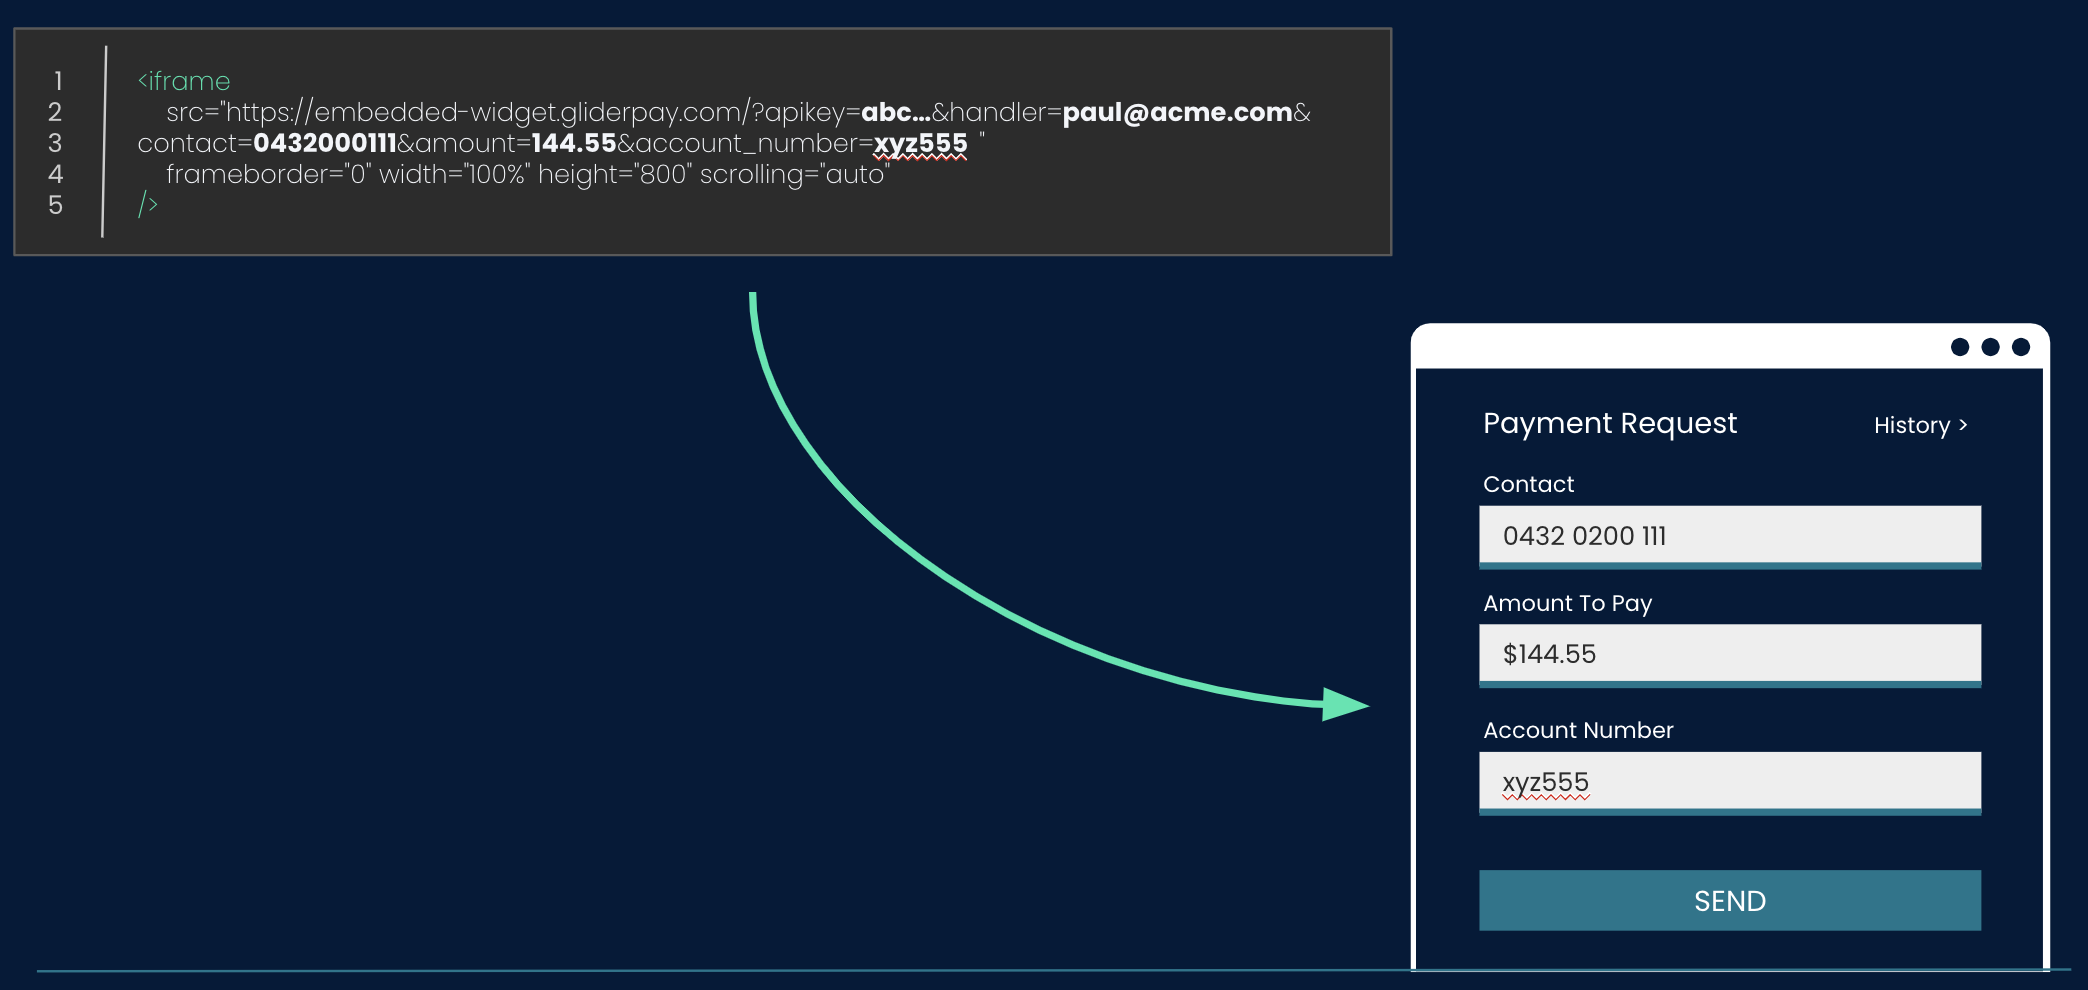
Step 3: Pre-fill your inputs (optional)
To pre-fill fields, just set the default values in the iframe source. Supported attributes for pre-filling include:
| Name | Description |
|---|---|
| account_number | Pre-fills the Account Number / Reference field in the agent form. |
| amount | Pre-fills the Amount field in the agent form. |
| contact | Pre-fills the Contact field in the agent form (mobile number or email address). |
Step 4: Security Considerations
While iFrame integration offers security benefits, it's essential to consider the following:
- Review your Content Security Policy (CSP): Ensure your CSP settings allow the integration of external content.
- Employ Defensive Code: Implement defensive code in the UI to verify that the current frame is the top-level window.
- Set Authentication Cookies Properly: Set authentication cookies with SameSite=Strict (or Lax) and Secure flags for enhanced security.
How to capture events
The iFrame sends invoice status events directly to the parent frame. Here's a simple JavaScript script to capture these events:
// Example JavaScript to capture events
window.addEventListener('message', function(event) {
    // Handle events received from the iframe
    console.log('Event received:', event.data);
    // Check for supported event names
    switch(event.data.eventName) {
        case 'invoiceSubmit':
            // Handle invoice submission event
            console.log('Invoice Submitted');
            break;
        case 'invoiceClicked':
            // Handle invoice clicked event
            console.log('Invoice Clicked');
            break;
        case 'invoiceRegistered':
            // Handle invoice registered event
            console.log('Invoice Registered');
            break;
        case 'invoicePaid':
            // Handle invoice paid event
            console.log('Invoice Paid');
            break;
        case 'invoicePaymentFailed':
            // Handle invoice payment failed event
            console.log('Invoice Payment Failed');
            break;
        default:
            // Handle other events
            console.log('Unknown Event');
            break;
    }
}, false);
Supported eventName to capture:
- invoiceSubmit: Triggered when an invoice is submitted.
- invoiceClicked: Triggered when an invoice is clicked.
- invoiceRegistered: Triggered when an invoice is successfully registered.
- invoicePaid: Triggered when an invoice is successfully paid.
- invoicePaymentFailed: Triggered when an invoice payment fails.
Feel free to customise the event handling based on your application's requirements.
And that's it! You're now ready to integrate Glider Widget seamlessly into your platform using the iFrame integration method. If you have any further questions or need assistance, feel free to reach out to our support team. Happy integrating!
Updated 10 months ago